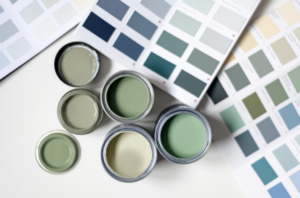
Sometimes, despite our best planning, a painting project takes just a bit longer than anticipated to complete. Or maybe your project is finished, and you want to keep your paint brushes in good shape for when you need them next. Regardless of the reason you need to store your paint brush, you’ll want to make sure you store it properly.
With this guide you’ll learn everything you need to know about proper paint brush care and storage, so that you can complete your projects as quickly and effectively as possible.
What Happens with Improper Storage?
Paint brushes come in a variety of bristle shapes and sizes – each with an intended use. Without proper care the bristles on your brush can warp and fray, making it harder to get the clean lines or even coverage you’re expecting from your brush. If you don’t clean your brush all the way the residual paint can stiffen the bristles and cause streaks to form in your painting. The worst case is that your paint brush can become entirely ruined, costing you time and money to find a replacement.
How to Store Your Paint Brush During a Project
If you need to pause in the middle of a project, whether that’s for a few hours or overnight, you probably don’t want to go through all of the trouble to completely clean and store your paint brushes. Fortunately, your brushes can stay in working shape with a few simple tricks. First, remove the excess paint from the brush. Then, take either plastic wrap or heavy duty aluminum foil and generously wrap the paint brush. The goal is to create a closed environment where the paint will not dry out before you come back. If it will be longer than 24 hours before you pick up the project again, you can wrap the brush as mentioned above, place it in a sealable bag and squeeze all the air out, then store it in the refrigerator. This should keep the brush and paint fresh up to a week, but keep in mind that the longer you plan to go between using your paint brush, the better it is to do a proper cleaning and storage.
To help keep the paint from drying on the edge of your brush between coats, you can store the paint brush in a sealed sandwich bag without wrapping it. This can also help you keep your work area more tidy, and avoid the small drips and “oops” moments that often accompany painting.
You deserve a break for completing that project – but don’t neglect the aftercare for your brushes. Whether you already know what you’re going to paint next or you’re holding on to those brushes just in case, there are a few steps you should take to ensure they work just as well the next time you use them.
1. Clean the Brush
The type of paint you used will determine the best way to clean your brushes, but regardless of the paint type you want to ensure you remove every bit of paint. For water-based paints, use warm water with a small amount of soap to lather and clean the bristles. A wire brush can help remove any paint that is stuck between bristles, and you should remove all paint from around the metal band as well.
For oil-based paints, you’ll want to use odorless mineral spirits or paint thinner instead of water to clean the paint brush. Make sure that no matter which you use you are working in a well-ventilated area. Pour the solvent into a small container, and let the paint brush soak in it for a few minutes. Then swirl the brush in the liquid to rinse the residual paint out. You can also use the wire brush between the bristles if needed. You may think that you have not cleaned your brush completely because it is still slightly the color of the paint you were using. While the bristles can retain some color, you will know your paint brush is clean when the water you are rinsing it with runs clear, or there is no residual paint running from the brush in a solvent. While cleaning your brushes is a critical step, it’s important to note that you do not want to store your brushes in water or mineral spirits as this can cause the bristles to lose their shape entirely.
2. Dry the Brush
Once you have thoroughly cleaned your paint brushes you are going to want to dry them out. This can be accomplished by shaking the brush vigorously or using a brush spinner to get all the water droplets out, and then patting them down until they’re mostly dry with a clean cloth.
3. Fix the Bristles
It is likely that even after a single project there are one or more bristles out of place on your brush, but this doesn’t mean you have to throw it out. You can use a wire comb or a brush comb to re-align the wayward bristles, and you can also use warm water to help reshape them if a lot have moved out of place (just remember to dry it again after).
4. Wrap and Store the Brush
The best way to store a paint brush once it is clean and dry is in the original packaging it came in. This is because the packaging is already aligned with the brush’s bristle shape, and this will encourage the brush to maintain its shape over time. If you don’t have the original packaging, don’t worry – you can easily make a substitute at home. Wrap the bristles in newspaper or paper towel, and then cut two pieces of cardboard out in the rough shape of the paint brush. Secure the cardboard on either side of the brush by
taping around the cardboard, and then store it in a flat, dry, climate-controlled area. Your paint brush is an investment, and you want your project to be done right. Take the time to properly care for your brushes, and it will save you time, money, and headache on the backend