
How to Pick the Perfect Paint Color for Any Room
Choosing a paint color can seem like a simple decision when you are looking to remodel a room or are moving into a new house.
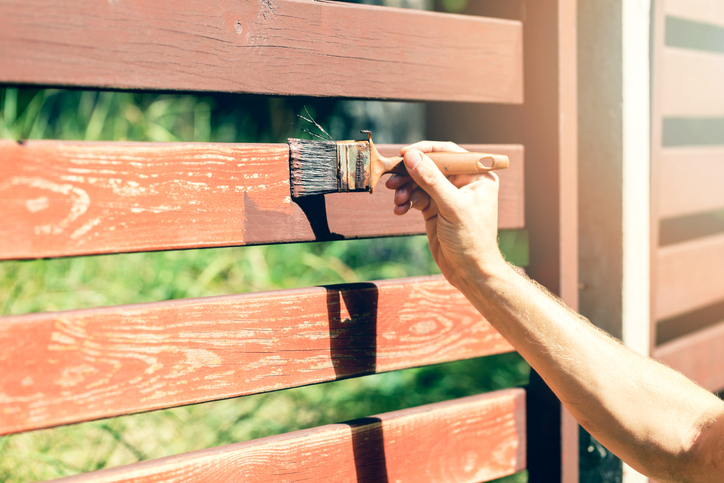
You’ve just installed your beautiful new fence! Now, while it cures, you have the difficult decision of choosing a stain or paint color. With all the options out there, how can you choose the right sealant for your fence?
First, before you settle on a color, consider the type of stain you need and how long it has been since your last stain application. Most experts recommend staining every three years for the best results.
Oil-based stains are the most durable stain for the money. They also hold up longer to UV damage, weathering and use. These need careful application and if you have some drips, you’ll need paint thinner to clean them up. Oil-based stains also require more time to dry, so you have to plan accordingly.
Oil-based stains also have a stronger odor than other options, but this is less of an issue for fence staining since the smell will quickly dissipate outdoors. They also last longer than water-based stains, so if you want less maintenance, then this is the option for you.
Water-based stains are a stain or paint solution that gives you more flexibility in terms of quick drying. They are also better for the environment and are able to expand and contract without flaking or drying, making them ideal for areas with significant changes in temperature.
Another option is an unpigmented clear coat. This offers some UV and weathering protection while still displaying the wood grain without any alterations. This poly coat is sometimes combined with fence stain for extra protection and waterproofing.
Finally, you can use exterior paint intended for wood. This will completely hide any elements of the wood, but it gives you the largest range of colors. So if you want a bright teal fence, this is your opportunity.

Your next thing to consider is how you want the wood to look. Paint in a water-based stain will hide all but the most distinct elements of wood grain. A less pigmented water-based stain will still show elements of the wood grain, but it will look more dull than oil. An oil-based stain, depending on the level of pigment, will allow the wood’s natural beauty to shine through while providing a high gloss and richer color.
When applying stain or color, there are a few application tips to consider.
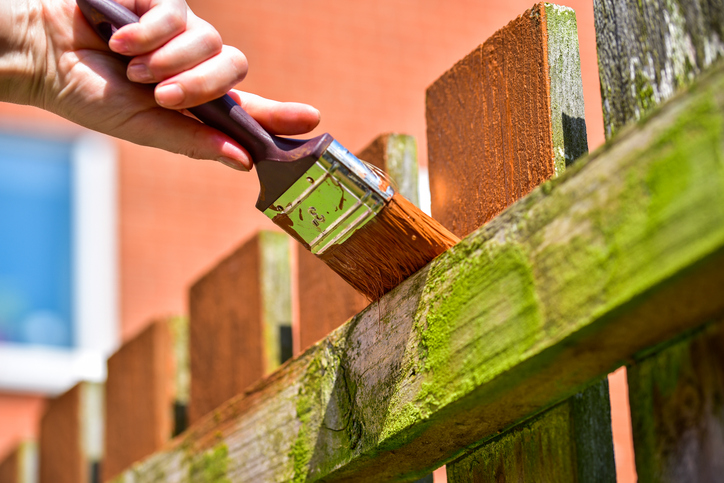
On a new fence with brand new panels, stain can be applied directly. Remove any loose debris such as leaves or cobwebs, add the stain and paint thinner to a sprayer and apply. Treated wood used for cross beams will absorb stain differently than untreated cedar, so you may notice some slight color differences.
Use a paint brush or roller to touch up any thin areas and make sure there are no drips. Follow directions on the canister regarding drying time. If you apply a new coat before the previous one has cured, you can wind up with drips and streaking. Additionally, the protective nature of the stain can be compromised if the stain is applied too thickly or if the wood was wet during application.
Watch out for the weather – oil-based stains can take two to three days to fully cure. Ideally you want a day with no rain, heavy winds or temperatures that are too hot or too cold when applying stain.
When applying water-based stain, make sure you evenly coat every plank since it dries much more quickly. Even pressure if using a roller is essential to preventing streaks or uneven adhesion.
Water-based stain is much quicker to dry than oil, and will be dry to the touch in three to four hours. It fully cures in two days, making it easier to go back and apply a second coat for darker color.
Paint can be applied with fewer restrictions around drying time, especially if you’re applying it with a paint sprayer. Several coats may be needed to get the color density you’re looking for. Test on a piece of scrap wood if you aren’t sure how one, two and three coats will look with your color of choice.
If your fence has had sections replaced or simply needs a new coat, the first step is to powerwash the fence to remove any algae, mold, damaged surface material and old stain/paint. After thoroughly power washing the fence, it will need a few sunny days to dry. Remember, if you paint a wet fence, you’re locking moisture in where it can damage the wood since it can’t evaporate.
If your previous paint was latex, you can choose latex or oil stain. However, if your fence was painted with oil, another oil stain is best because latex will not bond with oil stain and even the most thorough powerwashing can’t remove it completely.
After the fence has dried, you are ready to apply your new stain or paint of choice. Cedar responds especially well to power washing, which removes the gray exterior that comes from weathering to reveal the warm cedar tones underneath.
Paints and stains dry and cure at different times, but what does that distinction really mean? Simply put, drying time is the time it takes for stain to feel dry to the touch. If you were to touch it accidentally, you wouldn’t have any pigment stuck to you. At this point, if you were to scrape the paint or stain with your fingernail, it would leave a dent or scratch.
Curing time is the time it takes for paint or stain to fully harden. This is the paint at its best – durable and ready to stand up against the sun and the elements. You can scrape to your heart’s content and no damage would be done.
With proper preparation and application, you can choose the best fence stain for your needs. By protecting your fence with high-quality stain, you extend its lifespan and reduce ongoing maintenance.
Choosing a paint color can seem like a simple decision when you are looking to remodel a room or are moving into a new house.

Paint can transform your home by creating a beautiful accent wall, increasing the curb appeal of your property, or just giving a room a fresh
Have you ever found yourself getting dizzy from the smell of paint? Well it turns out, there’s a reason why. Many people experience headaches, dizziness,
Choosing a paint color can seem like a simple decision when you are looking to remodel a room or are moving into a new house.
Paint can transform your home by creating a beautiful accent wall, increasing the curb appeal of your property, or just giving a room a fresh